
Have you ever wanted to access AI without an internet connection or preserve the privacy of your personal/corporate documents? Using proprietary paid commercial AI like ChatGPT comes with limitations, namely costs, privacy and internet connectivity.
Advances in AI training and inference capabilities have made it possible to run local LLMs on lower-powered machines, like your own laptop. It can privately give you insights on your personal and/or corporate documents.
Artificial Intelligence has the capacity to significantly improve human productivity and assist us in understanding, summarizing, gaining insight from, and creating information. AI augmented human intelligence will give you an edge in the workplace and in your personal life.
Benefits of Local AI:
- Empower yourself with AI-enhanced productivity and insight
- Preserve data privacy and confidentiality
- Break free from internet-dependent AI
In This Guide:
I give you a step-by-step guide on how I set up my own local LLM. There are many different ways to do this. I found this method to be a healthy balance between high utility and minimal technical know-how.
I will only be reviewing my set up, not other methods of installation or other software tools out there (there are dozens).
Skip ahead if you:
- Don’t care about my at home set up
- Don’t need a summary of the software that we’re using
Then feel free to skip ahead to the part that is the Step-by-step Guide on How to Set Up a Local LLM on a MacBook Pro with Apple Silicon.

Content:
- System Requirements for Different Large Language Models
- My Home Set Up
- Guide to Building Local AI on a MacBook Pro with Apple Silicon
- Brief Overview of the Software Needed to Set Up Your Local LLM
- Step-by-step Guide on How to Set Up a Local LLM on a MacBook Pro with Apple Silicon
- Conclusion
System Requirements for Different Large Language Models
Not all set ups will be the same since this will depend on your hardware capabilities. This article is specific to Apple Silicon set ups, although I’m sure that you could do something very similar (if not identical) on Linux or Windows.
This set up should work for all Apple Silicon MacBooks or MacMini, MacStudio, iMac, or Mac Pro hardware. This includes M1, M2 and M3 series chips. Keep in mind though, that the M3 apple silicon chip will perform significantly better than the M1. For the M1 chip you might want to test out some smaller LLMs before increasing to larger LLMs.
The real limitations come in with RAM. Please reference the table below for rough guide on requirements.
Model, Model Size, Estimated RAM requirements (rounded to the nearest GB). Note some model sizes are given a range due to different versions of that specific model. There are other, larger models, but I have not included model sizes that are over 100 GB as this is out of the realm of personal hardware for most consumers.
| Model | Model Size | Estimated RAM requirements |
|---|---|---|
| Llama 3.1 8b-instruct-q4 | 4-5 GB | 8 GB |
| Llama 3.1 8b-instruct-q8 | 8.5 GB | 16 GB |
| Llama 3.1 8b-instruct-fp16 | 16 GB | 32 GB |
| Llama 3.1 70b-instruct-q4 | 40-44 GB | 64 GB |
| Llama 3.1 70b-instruct-q8 | 75 GB | 96 – 128 GB |
| Dolphin-Llama3: 8b-v2.9-q4 | 4-5 GB | 8 GB |
| Dolphin-Llama3: 8b-v2.9-q8 | 8.5 GB | 16 GB |
| Dolphin-Llama3: 8b-v2.9-fp16 | 16 GB | 32 GB |
| Dolphin-Mixtral: 8x7b-v2.7-q4 | 26-30 GB | 32 – 64 GB |
| Mixtral 8x7b-instruct-v0.1-q4 | 26 – 30 GB | 32 – 64 GB |
| Mixtral 8x7b-instruct-v0.1-q8 | 50 GB | 64 – 128 GB |
| Mixtral 8x22b-instruct-v0.1-q4 | 80 – 90 GB | 96 – 128 GB |
- The Dolphin Models are all instruct.
Estimated required RAM is about twice the model size, but not exactly. I have a 40 GB Llama 3.1 70b-instruct-q4 model that works reasonably well on my set up with 64 GB RAM, but it is slow and it also heats up my laptop so if I use that model I always ensure that my laptop is plugged in with a laptop fan on max underneath it.
My Home Set Up:
I have a Macbook Pro with Apple Silicon, specifically:
M3 Max MacBook Pro 16″:
- M3 Max Chip with
- 16-core CPU and
- 40-core GPU
- 16-core Neural Engine
- 64 GB RAM
- 1 TB SSD storage
You do not need this set up, most apple silicon chips with sufficient RAM will work really well, depending on the LLM use choose.
Brief Overview of the Software Needed to Set Up Your Local LLM
This is a guide for beginners, and I will do my best to explain how to set up your own local AI on your personal MacBook Pro with Apple silicon, but it does require a bit of command line interface (CLI). I will have all the commands here to copy/paste, and I will break down the pertinent information in each command.
I am show casing how you can set yourself up to build as many AI setups as you need/like on your own. These steps are easily repeatable.
The software that you will need includes:
- Homebrew
- Docker
- Ollama
- OpenWebUI
Homebrew
If you’re not familiar with homebrew, not to worry, you do not need to understand it much.
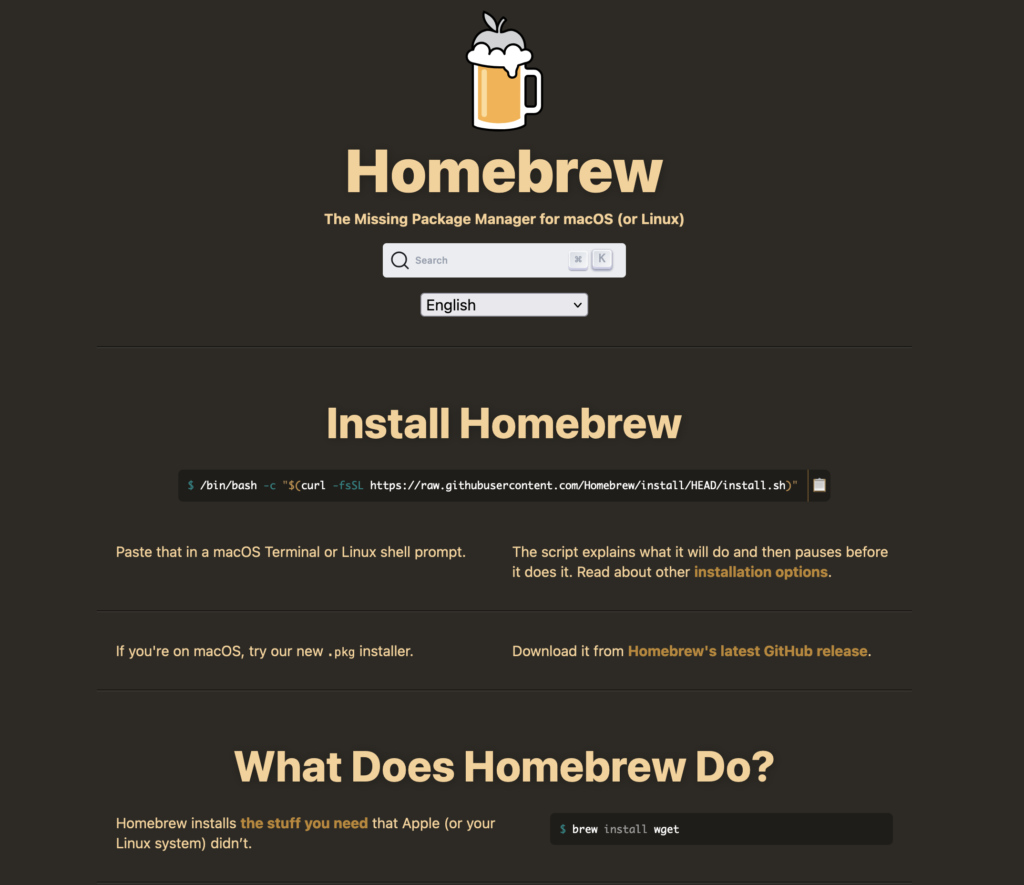
Homebrew is a way to install and manage software on your Mac without using the App Store. It allows you to easily download and install open-source software, like Large Language Models (LLMs), directly onto your device.
Think of Homebrew like a package manager for macOS. Just as your phone’s app store helps you find and install new apps, Homebrew helps you find and install new software on your Mac. This makes it easy to get the latest versions of open-source projects, including LLMs, without having to manually download and configure them.
In the context of local LLMs, using Homebrew allows you to easily install and manage various models, like Ollama or Mixtral, directly onto your MacBook Pro. This gives you more control over your software and data, as well as faster processing times, since everything runs locally on your device.
Homebrew is a popular tool among developers and power users who want more flexibility and customization options for their Macs. If you’re new to Homebrew or open-source software, don’t worry – it’s easy to get started with!
What is Homebrew?
Homebrew is a package manager for macOS that allows you to easily install and manage open-source software, like Large Language Models (LLMs), directly on your Mac. It makes it simple to download and configure software without manual effort.
Benefits for Local LLMs:
- Easy installation/uninstallation and management of various software
- More control over software and data
Who is Homebrew for?
Developers and power users who want flexibility and customization options on their Macs. Don’t worry if you’re new to Homebrew or open-source software – it’s easy to get started!
Docker
Docker is a tool that helps you package these apps into isolated “containers” that run independently of your Mac’s operating system. Think of it like a virtual container that wraps up everything an app needs to run, including its code, libraries, and settings.
Why Use Docker?
Here are some benefits:
- Isolation : Containers keep each app separate from the others, preventing conflicts or crashes.
- Consistency : You can easily create identical containers for development, testing, and production environments.
- Efficiency : Containers only use resources when they’re needed, making it easier to optimize system performance.
Docker in a Nutshell
Docker is like a lightweight virtual machine that lets you run multiple apps side-by-side without worrying about compatibility issues or resource conflicts. This makes it an essential tool for developers, DevOps teams, and anyone who needs to manage complex software environments.
In the context of Large Language Models (LLMs), Docker can be used to create isolated containers that run specific models or environments, making it easier to test, develop, and deploy these complex systems.
Ollama
What is Ollama?
Ollama is an Open Source application that allows for easy download/install of a variety of open source Large Language Models locally through Command Line Interface (CLI) on MacOS and Linux. As the name suggests, they started with the Llama LLM models created by Meta, but has since expanded its model library significantly (it now includes Gemma (by Google), Mixtral, Mistral, Qwen, llava, dolphin, and many more).
Ollama is critical open source software that democratizes access to LLMs enabling users to run small models locally for privacy and access to the potential of LLMs that is outside the purview of large gatekeepers such as OpenAI, Microsoft, Google, Apple, etc.
Although, if you’re like most people, you’re uncomfortable using Command Line Interface. That’s where [[#OpenWebUI]] comes into play, but first, let’s get set up with Ollama.
OpenWebUI
What is OpenWebUI?
OpenWebUI is a browser-based interface designed specifically for managing and interacting with Large Language Models (LLMs). It provides a user-friendly way to interact with your LLMs, making it easier to manage conversations, models, documents, and other related data.
It is a feature rich extensible and user friendly self hosted (local) WebUI (browser based) designed to work entirely offline (because it is all local).
Key Features:
- Conversational Interface: OpenWebUI allows you to engage in natural-sounding conversations with your LLMs.
- Model Management: You can create, manage, and delete LLM instances within the interface.
- Conversation History: OpenWebUI enables you to review and analyze conversation history for each model.
- Simple Reasoning Engine (RAG): The interface includes a simple RAG (retrieval augmented generation) that allows you to upload text-based documents to reason about entities and relationships in those documents (aka answer questions or discuss the context of said text-based documents).
- Personalization: You can create/manage “memories”, or pieces of (text-based) information that you want the LLM to remember (for example that you are a man/woman, or what your profession is, etc) to create more natural and contextual conversations.
How does it work?
OpenWebUI interacts with your local LLMs using APIs or other interfaces, allowing you to manage and interact with them through the browser-based interface.
Tips BEFORE installing OpenWebUI
- Admin Creation: The first account created on OpenWebUI gains Administrator privileges, controlling user management and system settings.
- Subsequent sign-ups start with pending status, requiring administrator approval for access. This can be changed by the administrator in settings later.
Privacy and Data Security
All of your data, including login details, is locally stored on your device only (I know, redundant to say, but emphasizes the point). According to OpenWebUI: “Open WebUI ensures strict confidentiality and no external requests for enhanced privacy and security.” (source)
Step-by-step Guide on How to Set Up a Local LLM on a MacBook Pro with Apple Silicon
Follow the step-by-step guide below and you will be able to start using your local LLM immediately without WiFi!
Installing Homebrew
- Open Terminal (command + space bar, and type “terminal”, or find it in your applications folder)
- Run the Install Command: in the terminal window, type and run the command below. This will download and install Homebrew on your Mac.
/bin/bash -c "$(curl -fsSL https://raw.githubusercontent.com/Homebrew/install/HEAD/install.sh)" - Verifying Homebrew – check if Homebrew was successfully installed. After installation type:
brew --version. This should display the version of Homebrew that’s installed on your Mac. - Update Homebrew (optional) – if you want to ensure that you have the latest version of Homebrew.
brew update && brew upgrade - Add Homebrew to path: Adding Homebrew to your
PATHenvironment variable ensures that the system knows where to find thebrewcommand when you type it in the Terminal.export PATH="/opt/homebrew/bin:$PATH"- The command may vary slightly if you’re on a Mac or Linux. The command will be available for you to copy and paste from your terminal after installing Homebrew
Installing Docker with Homebrew
- Open Terminal (command + space bar, and type “terminal”, or find it in your applications folder)
- Run the Install Command: in the terminal window, type and run the command below. This will download and install Docker on your Mac.
brew install --cask docker - Verifying Docker – check if Docker was installed successfully; after installation, in terminal type:
docker --version. This should display the docker version that is installed on your Mac.
Installing Ollama with Homebrew:
- Open Terminal
- Update Homebrew, type:
brew update - Install Ollama, type:
brew install ollama - Start Ollama, type:
brew services start ollama - Install Your LLM:
- This step will take anywhere from 30min up to a few hours, depending on (1) Your internet speed, and (2) the size of the LLM model that you choose
- Navigate to Ollama Model Library and choose the model that you want to download.

Install Your LLM
This step will take anywhere from 30min up to a few hours, depending on (1) Your internet speed, and (2) the size of the LLM model that you choose.
Choose Your Large Language Model
Navigate to Ollama Model Library and choose the model that you want to download (see screenshot above).
Select the model you want to download. For this example, I’ve navigated to the Llama 3.1 page where the Ollama site has a repository of the Llama 3.1 model versions.
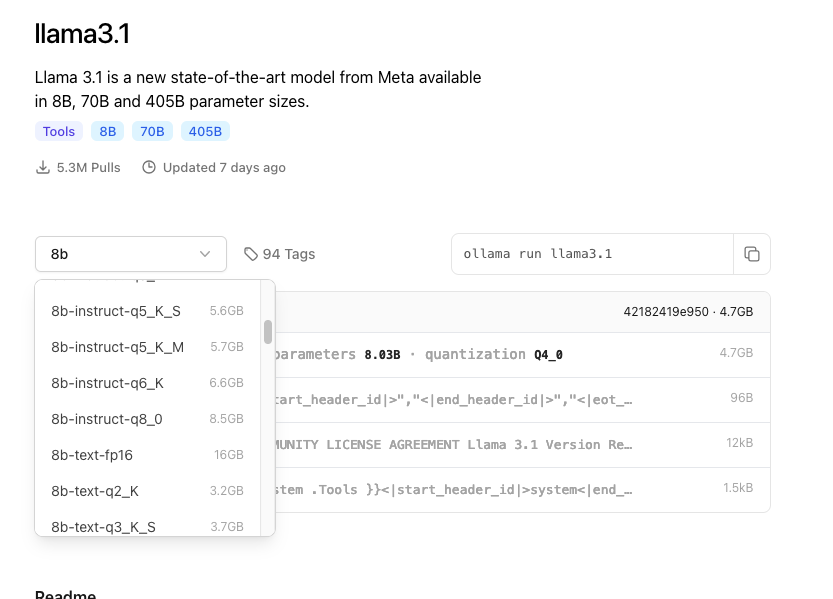
I’ll select the Llama 3.1 8b-instruct-fp16, which is 16 GB in size. To choose this model, select the model from the drop down menu and click “view more” and then scroll until your find the 8b-instruct-fp16 version (or the model of your choice). Once you select your preferred model you will notice there is a command that you can copy – its just to the right of the drop down menu. However, I do not want you to paste it as is into your Terminal command line – read on!
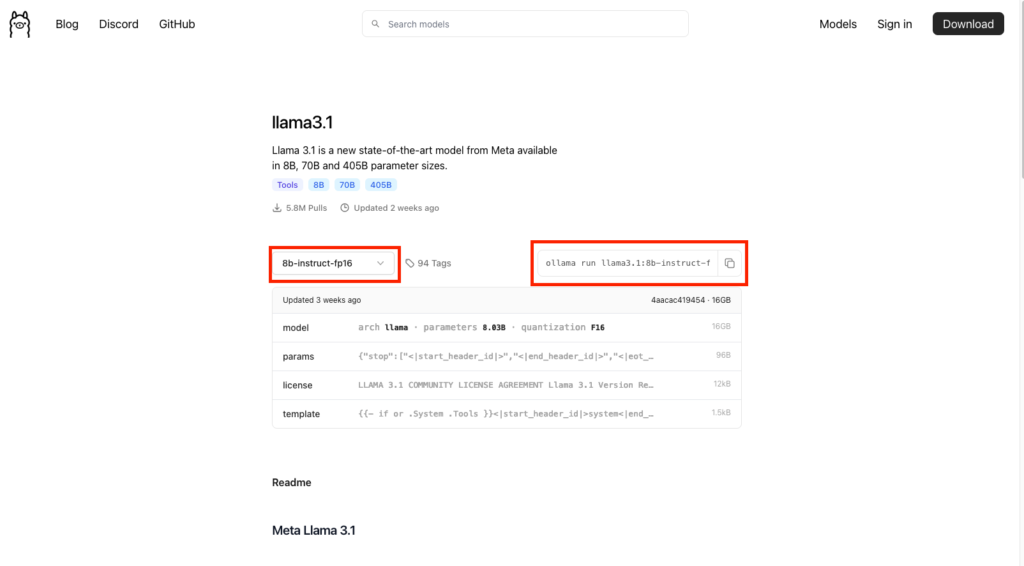
Install Your Large Language Model
Navigate back to your Terminal window and paste (without hitting enter) the command that you copied from the Ollama webpage. For me that looks like:ollama run llama3.1:8b-instruct-fp16
BEFORE YOU HIT ENTER – change the word “run” to “pull”.
The run will download AND run the model in your terminal window. You do not want to do that. The pull command will only download the model and not run it.
The command should read: ollama pull llama3.1:8b-instruct-fp16
Now click enter.
The model will download. Go for a walk, stretch, have some coffee – take a break, you deserve it!
Installing OpenWebUI with Docker (RECOMMENDED)
- Open Docker – just leave the Docker GUI running in the background, we’ll come back to this later.
- Ensure Ollama is open/running in background – you will see the icon circled in the image below, at the top right of your MacBook screen (see image below)
- Open Terminal and run:
docker run -d -p 3000:8080 --add-host=host.docker.internal:host-gateway -v open-webui:/app/backend/data --name open-webui --restart always ghcr.io/open-webui/open-webui:main - Navigate to the Docker GUI: You will see a docker container called “open-webui”.
- Simply click on the port for the container that you want to open and viola! Your default web browser will open up with the OpenWebUI interface.
About Step 3 command and some optionality:
When using Docker to install Open WebUI, make sure to include the -v open-webui:/app/backend/data in your Docker command. This step is crucial as it ensures your database is properly mounted and prevents any loss of data.
This guide uses Docker named volumes to guarantee the persistance of your data within the container. This might make it difficult to know exactly where your data is stored on your machine if this is your first time using Docker. Alternatively, you can replace the volume name with a absolute path on your host machine to link your container data to a folder in your computer using a bind mount.
Example: change -v open-webui:/app/backend/data to -v /path/to/folder:/app/backend/data
Ensure you have the proper access rights to the folder on your host machine.
Visit the Docker documentation to understand more about volumes and bind mounts.
Give a unique name to your Docker Container, in the above command where is says --name open-webui you can change “open-webui” to a specific name for the container like “Mark-local-ai”, reading: --name mark-local-ai.
This is all clearly explained in the OpenWebUI Documentation
Conclusion
In this guide, we’ve walked you through setting up a local Large Language Model (LLM) on your MacBook Pro with Apple Silicon. With the power of open-source software and Docker, you can now access AI capabilities without relying on internet connectivity or proprietary platforms.
By following these steps, you’ll have installed Homebrew, Docker, Ollama, and OpenWebUI, providing a comprehensive setup for running local LLMs. You’ll be able to download and install various models, manage conversations, and interact with your LLMs through the user-friendly interface of OpenWebUI.
This setup empowers you with AI-enhanced productivity, preserves data privacy and confidentiality, and breaks free from internet-dependent AI. The flexibility and customization options offered by this solution make it ideal for developers, power users, and anyone looking to harness the potential of LLMs.
As we’ve seen throughout this guide, the M3 Max MacBook Pro 16″ with 64 GB RAM provides a robust hardware foundation for running local LLMs. However, it’s essential to note that even more modest Apple Silicon chips can work well with smaller models and sufficient RAM.
We hope you’ve found this guide informative and helpful in setting up your own local AI on your MacBook Pro. With this setup, the possibilities are endless, and we’re excited to see how you’ll utilize this technology to improve your productivity and creativity.
If you did not find my guide very helpful, here are some resources that I used to help me:
- What are LLMs?
- Ollama, What is it?
- Ollama Explained
- What is Ollama
- Medium: Run Llama 3.1 Locally
- OpenWebUI Install Guide
- Docker Storage: Volumes vs Bind Mounts
If you did or did not find it helpful, I would love any comments or constructive criticisms. Thank you very much for reading!
Mark